How to share screen videos online?
Introduction
Not all free programs that help you take screenshots also allow you to capture screen or webcam videos.
Screen Recorder Studio is a free program with an intuitive interface, that will allow you to add notes to your videos or screenshots, as well as upload them online and share instantly. You can upload screenshots to an HTTP or an FTP (for premium users) server and videos to your YouTube account. The program records videos in the most popular formats such as MKV, AVI, MP4, MOV, and etc.
Step 1: Download and launch the program
Download Screen Recorder Studio, launch the installation wizard and follow the installation guide. Note that there is also a one-click installation mode.
Step 2: Capture a screen video
Screen Recorder Studio operates in two modes: screenshots and video. The latter is the default one. If you would like to save a screen video in a certain format, pre-select it in the 'Recording settings' tab in the settings menu.

To capture a screen video first adjust the frame by simply moving it with the mouse, note that you can also use the square with the cross in the center to recenter the frame. Click on the 'Record' button at the bottom of the screen to start recording the video. Note that you can also pause the recording at any time using the button at the bottom.
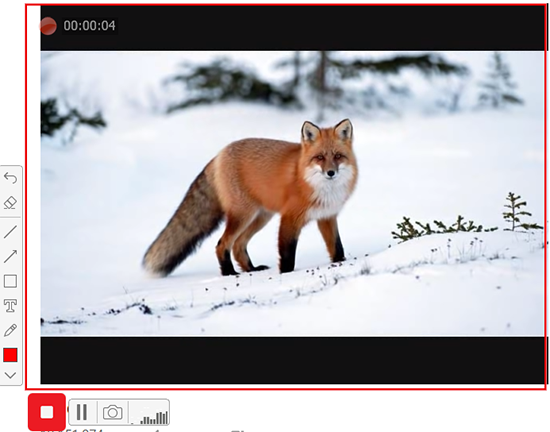
Note the 'Camera' icon there as well, it enables you to take screenshots while recording screen videos. These screenshots will be automatically saved on your computer or uploaded to an online server (the type of the server will depend on whether you are using a free or a paid version of the program). To adjust the default saving settings, go to the settings menu.
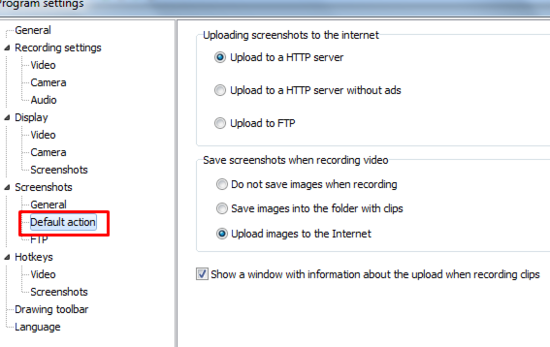
As soon as you click on the 'Camera' icon, a window will pop up in the right bottom corner of your screen. It will feature a link to either the output folder on your PC or an online server where the screenshot has been placed.

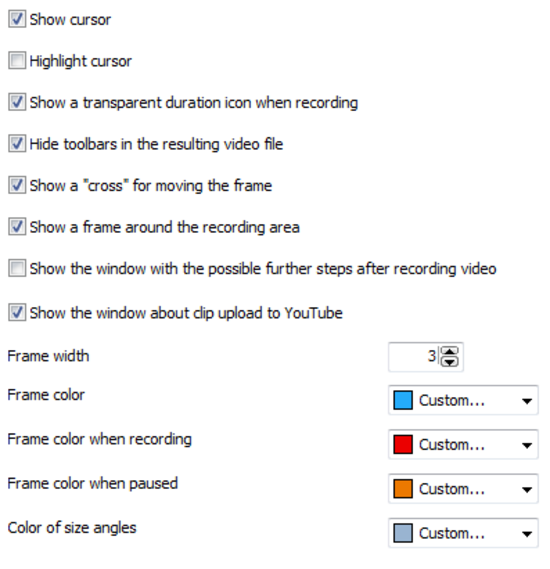
When the video is being recorded the frame will turn red. When paused it will switch to orange. You can adjust the color settings in the settings menu as well.
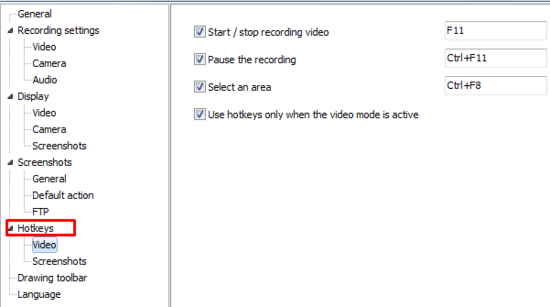
If you don't need the whole video, you can pause and stop the recording at any time. Adjust the hotkeys in the 'Hotkeys' tab of the settings menu.
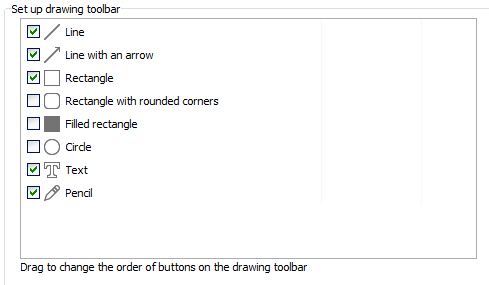
Note that you can also add or edit the tools displayed on the drawing toolbar in the settings menu
Step 3: Save and share your video
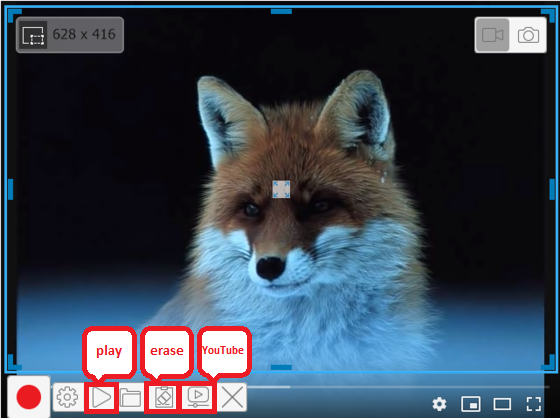
There are multiple one-click solutions for freshly recorded videos: you can play the last one or erase it right here in the program.
You can also save your video to a folder on your computer or upload it directly to your YouTube account.
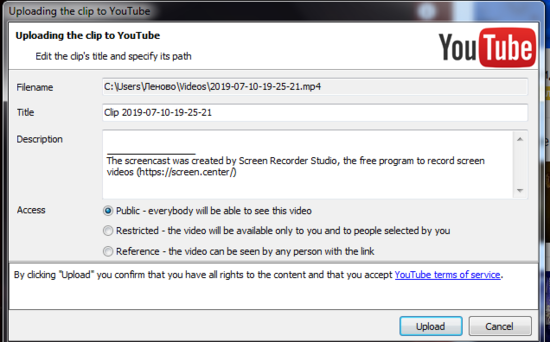
A popup window will allow you to select the video's privacy settings as well as add its title and description.
Search
Related
- How to share screen videos online?
- How to rotate videos?
- How to capture video?
- How do I convert AVI to Zune?
- Movavi VideoSuite 4.4 review
- How to record a screen video?
- How to make a video tutorial?
 How to add a watermark to your video?
- How to fix a blurred video?
- How to increase brightness of a dark video?
- How do I combine AVI episodes into a full-length professional looking movie?
- How do I stay anonymous in a webcam chat?
- How do I improve quality of videos and old movies?
- AVS Video Editor 3.4 review
- MOVAVI Releases EnhanceMovie 2.0
- MOVAVI Releases EnhanceMovie 1.3
- How to play MKV file?
- How to play any video?
Ask our expert
- How to share screen videos online?
- How to sort duplicate music files by ID3 tags?
- How to get quick updates on movies by director?
- How to convert multiple MIDI files into an MP3?
- How to rotate videos?
- How to convert WMA to WAV?
- How to play MIDIs on an iPhone?
- How to split an audio file into equal parts?
- How to split m4b audiobooks into chapters for free?
- How to convert videos for You Tube?


